This article is a direct translation from Florian Burnel’s work on his blog, IT Connect. The original piece can be found here
If you want to install CrowdSec on a Microsoft Exchange 2019 server, you can find a tutorial also written by Florian Burnel and translated to English, here.
I. Introduction
Until today, the CrowdSec agent was only working on Linux / FreeBSD machines, but we recently released a Windows agent.
The Windows agent is very important because it will allow you to secure your Windows machines as well. For the moment, unlike the Linux version, the Windows agent does not yet support automatic configuration during its installation.
By default, it is able to detect brute force attacks against RDP and SMB services. With a little manual configuration, you can also detect attacks against SQL Server, but also HTTP attacks against IIS, or attacks against Exchange.
CrowdSec for Windows will also be able to detect network scans that attempt to get past the Windows firewall.
II. In this tutorial
In this tutorial we will focus on two cases:
- Blocking a brute force attack on an RDP connection (from the Windows “Remote Desktop” client, for example)
- Blocking a scan of a website hosted on an IIS server
Prerequisites:
- A machine to protect with CrowdSec: a virtual server running Windows Server 2022 (but you can use another version of Windows) hosted on the Azure Cloud
- A machine to simulate attacks: a virtual server under Kali Linux with a few tools (a Kali Linux machine via WSL will also work)
III. Setting up CrowdSec on Windows
Let’s start by downloading the CrowdSec installation sources. The Windows installer is available from the Github releases.
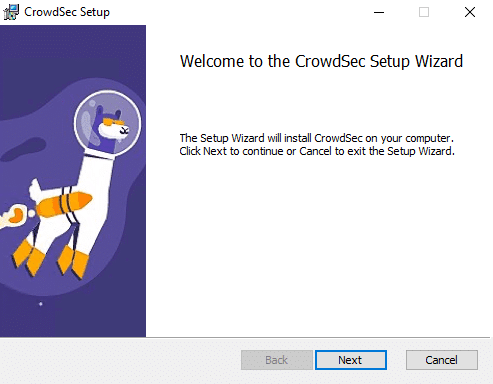
A. Install the CrowdSec Windows agent
When the MSI is installed on a Windows machine, it will allow us to install CrowdSec in “C:Program FilesCrowdSec”, but also to download the Windows collection, register the instance with the Central API, and create the CrowdSec service (so that it starts automatically at the same time as Windows).
From there, the installation will only take a few clicks.
B. Installation of the Windows Firewall bouncer
The bouncer can be downloaded from the Github release of the project here.
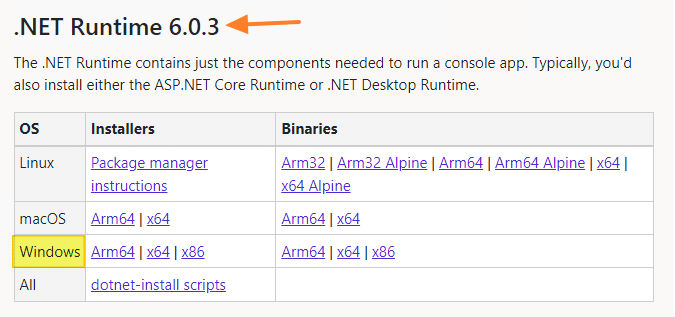
The bouncer depends on the .NET 6 Runtime. You can either install it manually and download the MSI file from our release, or download the setup bundle that will also install the .NET runtime for you.
.NET runtime installation
If you choose to download the bundle, or already have installed the .NET runtime, you can skip this section.
It is important to download the “.NET Runtime” and not another element, then to take the Windows version in “Install” format. In this case in x64 in the column “Installers” for our Windows server in 64 bits.
Download Framework .NET 6.0 from Microsoft.com
The installation process is also very simple, just follow the wizard…

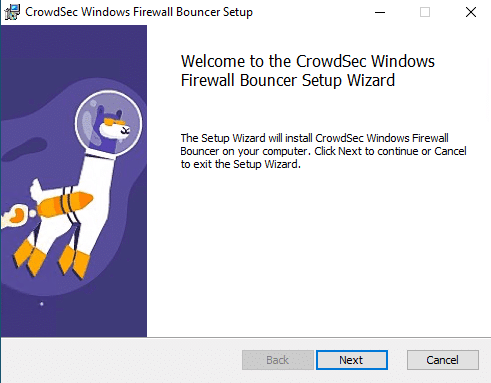
Once this is done, we can move on to the installation of the “Windows Firewall” bouncer.
Bouncer Installation
Run the installer you previously installed, and follow the setup wizard to install the bouncer.
Open a console on the Windows machine and list the bouncers: cscli bouncers list

CrowdSec is now ready to use! We will be able to test it in different scenarios.
IV. Testing CrowdSec protection
To test the effectiveness of CrowdSec and see its ability to protect the Windows server, let’s cover 2 use cases:
- Protection of a web server “IIS”
- RDP (Remote Desktop) access protection
A. CrowdSec and IIS
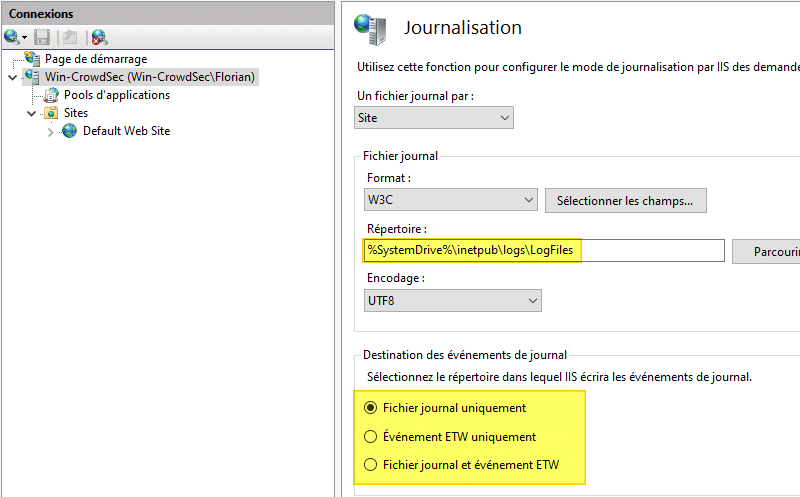
Before testing CrowdSec, let’s have a look at the IIS server itself. It is a simple server, with the default site and a page that displays text, all accessible on a public IP address in HTTP. As for the logs of this IIS server, they are stored in the log files in the default location.
With IIS, you can store the logs in files, in the event viewer, or in both places. To find out where the server’s logs are located, you need to open the IIS console, click on the server in the upper left corner, then on “Logging”. A window appears and there are two particularly interesting fields:
- Directory: the path to the log files
- Destination of log events
Now you know a bit more about the configuration of my IIS server, let’s get right down to it.
Currently, CrowdSec is not sufficiently configured to protect our IIS server. In fact, we can check this quite easily… First of all, we will list the active decisions in order to see which IP addresses are currently banned: cscli decisions list
Well, there are some IP addresses…

This means that CrowdSec has already blocked attacks. In the Reason column, we can see “windows-bf”, which corresponds to Windows brute force, in this case on the RDP access, because we voluntarily exposed it on the Internet (for the second test).
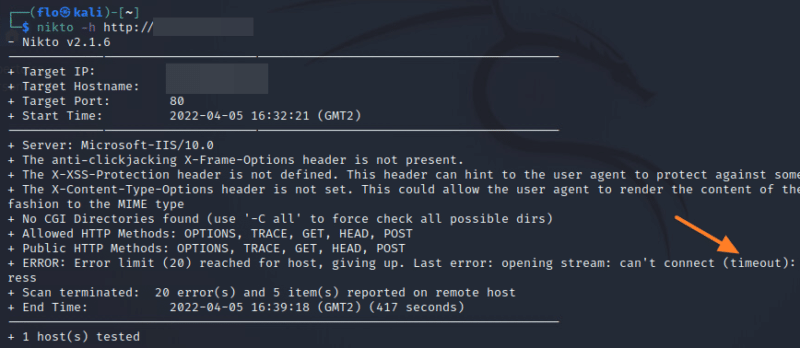
On the other hand, from a remote machine, we can scan the IIS server with different tools such as Nikto without being blocked by CrowdSec!
nikto -h http://ip-publique-serveur-iis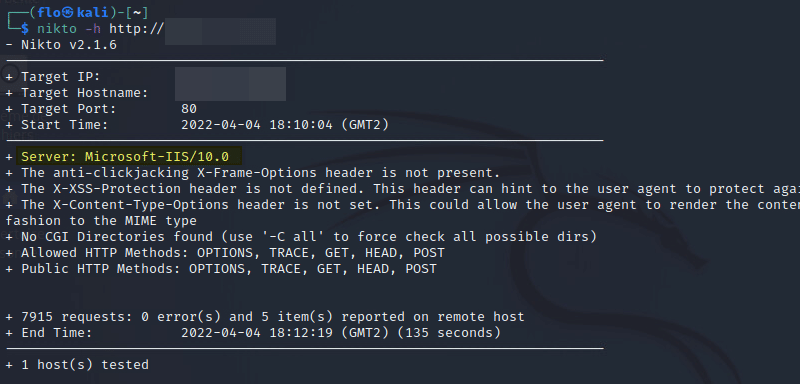
This is absolutely normal. We will have to modify CrowdSec’s configuration in order to tell it where the IIS logs are located and make it understand that it must monitor this service on the webserver. Before that, we have to install the IIS collection on the server with this command: cscli collections install crowdsecurity/iis
The installation will be taking a few seconds…
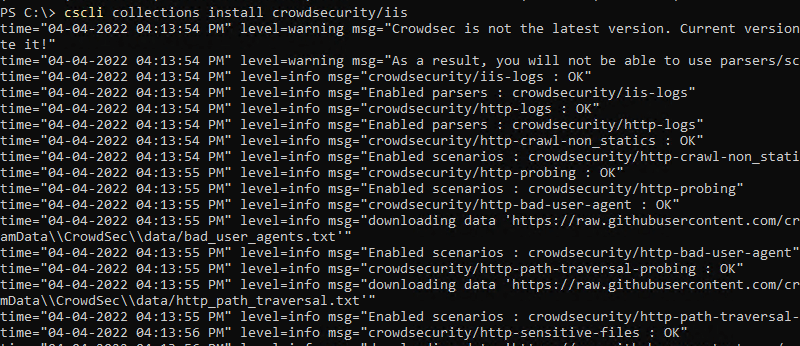
You can check that everything works fine with the following command: cscli collections list
Then you will have to modify the following file: C:Program FilesCrowdSecconfigacquis.yaml In order to add the following lines right after:
---use_time_machine: true
filenames:
  - C:inetpublogsLogFiles**.log
labels:
  type: iis
You can see the presence of a “dynamic” path: “C:inetpublogsLogFiles**.log“. This value will allow CrowdSec to find and read the log files located in “C:inetpublogsLogFilesW3SVC1” and analyze them. If you use another path or even another volume for the logs, you will have to adapt this value.
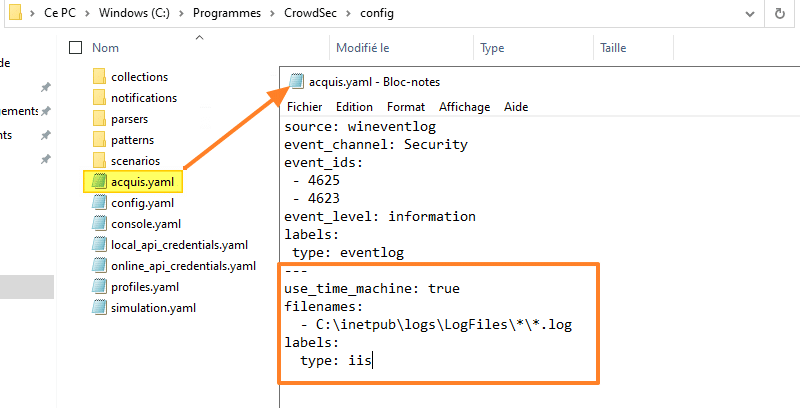
In the piece of code we just added, there is a parameter I want to draw your attention to: use_time_machine. IIS does not write logs in real-time to the log file, but it writes new events in bulk, every minute. Thanks to this parameter, CrowdSec will read the date and time of each line to process the events chronologically.
However, if you are not using the log files but the event viewer, you must use this piece of code and not the one mentioned above:
---
source: wineventlog
event_channel: Microsoft-IIS-Logging/Logs
event_ids:
  - 6200
event_level: information
labels:
  type: iis
Save the acquis.yaml file and close it. Finally, you will need to restart the CrowdSec service with the below command:
Restart-Service crowdsecLet’s get back to the remote host and Nikto.
nikto -h http://ip-publique-serveur-iisThis time, things go wrong… Nikto displays an error and tells me that it “can’t connect (timeout)”. Interesting.
On the IIS server protected by CrowdSec, we will now list the active decisions to see what is going on: cscli decisions list
We can see that my remote host is banned by CrowdSec, the reason being “http-probing”, which means that the attack targets the web service and thus IIS.

The remote host no longer has access to the server, which explains the timeout in Nikto.
Since we use a bouncer called “Windows Firewall”, we should logically find information on banned IP addresses directly in the Windows firewall rules. This is indeed the case, there are several rules created and managed by CrowdSec. By searching in one of the rules, we can find the IP address of my remote host from which we issued the Nikto scan.
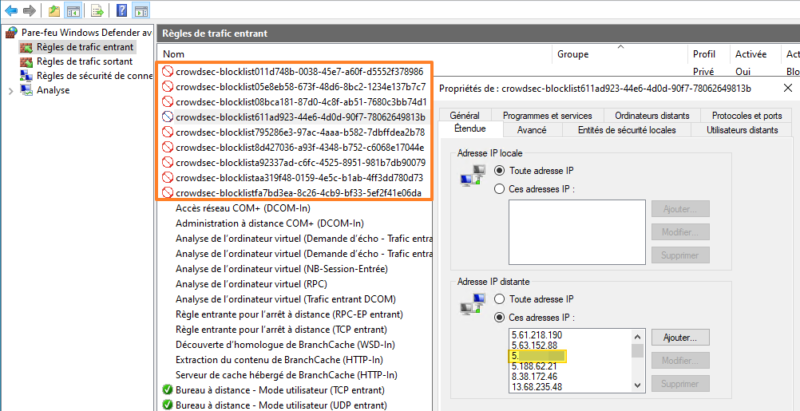
When a machine is blocked, it is totally blocked, i.e. on all ports and all protocols.
Note: By default, a machine is banned for a duration of 4 hours, but if you want to adjust this value, just modify the “duration” parameter in the “profiles.yaml” file. Remember to restart the CrowdSec service to implement the change.
B. CrowdSec and RDP
Let’s talk about our second case: protecting RDP access. For the sake of this demo, we did something wrong: we published a server on the Internet, on port 3389 corresponding to the default port of the RDP protocol. Thus, it is at the mercy of bots of all kinds. This explains why the CrowdSec instance quickly banned some IP addresses (as seen before).
To perform a brute force RDP, we could simply open the Windows Remote Desktop client and make looping attempts. But instead, we will use the Crowbar tool. Game on: CrowdSec VS Crowbar. Crowbar is a brute force tool that supports several services: RDP, OpenVPN, SSH, and VNC.
In order to use Crowbar on my machine where Nikto is located and which runs under Kali Linux, I need to install the package: sudo apt-get install crowbar
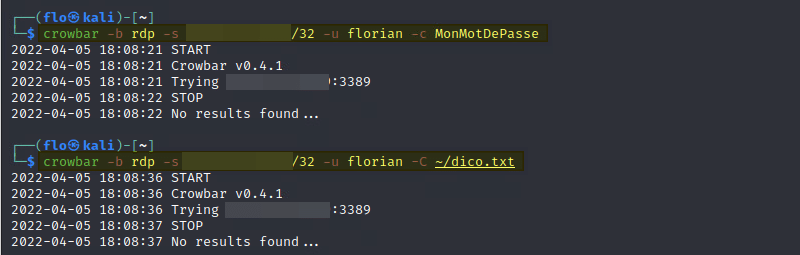
Then I just have to target my RDP access: crowbar -b rdp -s
The above command targets the public IP address of my server, and will try the user “florian” with the password “MyPassword1”. To make it more realistic, we can use a password dictionary. To achieve this, let’s create a small dictionary “dico.txt” on my machine:
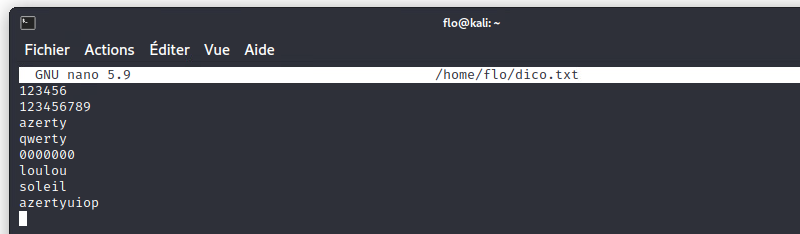
Then, let’s attack my server again using this dictionary (the -c option is replaced by -C). This time, we are going to carry out a real brute force attack because Crowbar is going to test all the passwords in my dictionary.
crowbar -b rdp -s /32 -u florian -C ~/dico.txt Obviously, it didn’t succeed to connect…
However, it was detected by CrowdSec! As a result, the public IP address used by the Crowbar host is also banned.
cscli decisions list
To detect brute force attacks on the Windows host, CrowdSec looks at the machine’s event viewer, and more specifically at events with IDs 4625 and 4623 in the security log. Indeed, a failed login generates an event of this type.
Game over: the big winner of this duel is CrowdSec!
V. Conclusion
We have just seen, through these two examples, the interest in implementing a security tool such as CrowdSec on a Windows server in order to increase the security level. The porting of CrowdSec to Windows looks promising and the tool works well.
Even though I simulated attacks from outside and not all Windows servers are published on the Internet (especially in RDP as I did), CrowdSec can protect you very well against an attack coming from inside your local network. Otherwise, coming back to IIS, CrowdSec can be very useful to protect applications that use this web server like Exchange webmail (Outlook Web Access).