Introduction
The microservice architecture is the most significant security challenge in a Kubernetes (K8s) cluster. Every application you deploy opens a new potential entry for attackers, increasing the attack surface.
As deployed applications generate logs and CrowdSec can run in a container… You see where I am going with this.
In this blog post, we will see how to install CrowdSec in a K8s cluster, configure it to monitor the applications we want, and see the magic happen by detecting attacks on those applications.
The first part will cover the detection and the second, which is still a work in progress, will tackle the prevention.
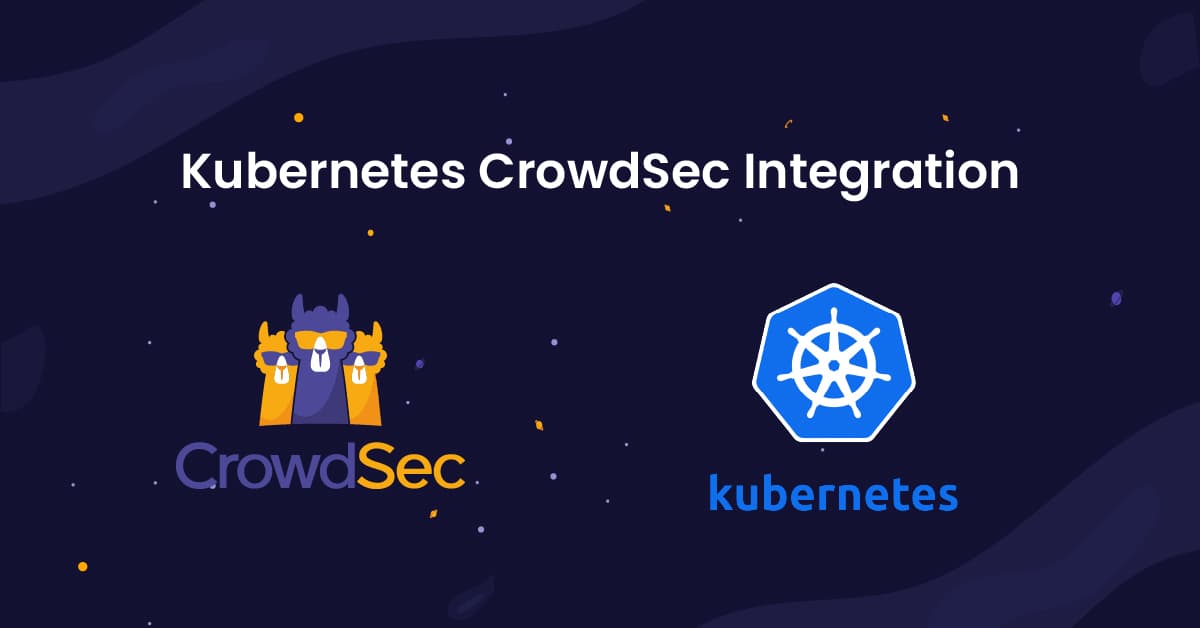
Architecture
Here’s an architecture overview of CrowdSec inside a K8s cluster.

Prerequisites
Before starting this guide, ensure you have:
- (Configured AWS account + eksctl) or an existing K8s cluster (ensure your cluster has enough resources available, at least 1 CPU + 1GB of RAM).
- kubectl
- helm
Ready to start? Let’s play!
Setup the test environment
Deploying K8s cluster
For people who aren’t lucky enough to have a K8s cluster, we will deploy one easily using AWS EKS, Eksctl.
Here is a simple configuration that will deploy a cluster with 1 t2.small node.
apiVersion: eksctl.io/v1alpha5kind: ClusterConfig

metadata:
  name: alpaga
  region: eu-west-1
  version: "1.21"

nodeGroups:
  - name: ng-1
    instanceType: t2.small
    desiredCapacity: 1
    ssh:
      allow: true
If you want more nodes, you just need to change desiredCapacity.
We can run our command to create the cluster:
$ eksctl create cluster -f cluster.yaml

2021-09-17 17:39:41 [ℹ] eksctl version 0.62.0
2021-09-17 17:39:41 [ℹ] using region eu-west-1
2021-09-17 17:39:41 [ℹ] setting availability zones to [eu-west-1a eu-west-1c eu-west-1b]
2021-09-17 17:39:41 [ℹ] subnets for eu-west-1a - public:192.168.0.0/19 private:192.168.96.0/19
2021-09-17 17:39:41 [ℹ] subnets for eu-west-1c - public:192.168.32.0/19 private:192.168.128.0/19
2021-09-17 17:39:41 [ℹ] subnets for eu-west-1b - public:192.168.64.0/19 private:192.168.160.0/19
2021-09-17 17:39:41 [ℹ] nodegroup "ng-1" will use "ami-044dfe22e0788d8ed" [AmazonLinux2/1.21]
2021-09-17 17:39:41 [ℹ] using SSH public key "/home/.ssh/id_rsa.pub" as "eksctl-alpaga-nodegroup-ng-1-7f:94:de:2d:82:df:52:b1:e1:56:4b:a6:7f:2e:91:72"
2021-09-17 17:39:42 [ℹ] using Kubernetes version 1.21
2021-09-17 17:39:42 [ℹ] creating EKS cluster "alpaga" in "eu-west-1" region with un-managed nodes
2021-09-17 17:39:42 [ℹ] 1 nodegroup (ng-1) was included (based on the include/exclude rules)
2021-09-17 17:39:42 [ℹ] will create a CloudFormation stack for cluster itself and 1 nodegroup stack(s)
...
2021-09-17 18:00:57 [ℹ] nodegroup "ng-1" has 0 node(s)
2021-09-17 18:00:57 [ℹ] waiting for at least 1 node(s) to become ready in "ng-1"
2021-09-17 18:01:49 [ℹ] nodegroup "ng-1" has 1 node(s)
2021-09-17 18:01:49 [ℹ] node "ip-192-168-68-125.eu-west-1.compute.internal" is ready
2021-09-17 18:03:51 [ℹ] kubectl command should work with "/home/.kube/config", try 'kubectl get nodes'
2021-09-17 18:03:51 [✔] EKS cluster "alpaga" in "eu-west-1" region is ready
When deploying your cluster, you will be able to collect some information.
$ kubectl cluster-info

Kubernetes control plane is running at https://XXXXXXXXXXXXXXXXXXXXXXXXXXXX.gr7.eu-west-1.eks.amazonaws.com
CoreDNS is running at https://XXXXXXXXXXXXXXXXXXXXXXXXXXXX.gr7.eu-west-1.eks.amazonaws.com/api/v1/namespaces/kube-system/services/kube-dns:dns/proxy
Deploying Nginx Ingress Controller
First, we need to install nginx helm repo
helm repo add ingress-nginx https://kubernetes.github.io/ingress-nginx
helm repo update
We can now install Nginx ingress controller using this chart with those following values to support proxy-protocol and have the Source IP in the logs. So you need to create new file ingress-nginx-values.yaml where you will post those values:
controller:
  image:
    PullPolicy: IfNotPresent
    image: crowdsecurity/controller
    # Crowdsec Remediation with Ingress Nginx requires to use our controller image
    tag: v1.13.2
  service:
    annotations:
      service.beta.kubernetes.io/aws-load-balancer-backend-protocol: tcp
      service.beta.kubernetes.io/aws-load-balancer-proxy-protocol: "*"
      service.beta.kubernetes.io/aws-load-balancer-cross-zone-load-balancing-enabled: 'true'
      service.beta.kubernetes.io/aws-load-balancer-type: nlb
  config:
    use-proxy-protocol: true
    proxy-real-ip-cidr: 192.168.0.0/16
You can install the Nginx ingress controller in using this command:
helm install -n ingress-nginx ingress-nginx ingress-nginx/ingress-nginx -f ingress-nginx-values.yaml --create-namespaceA new LoadBalancer will be created in your AWS account, you need to enable manually “Proxy protocol v2”.
Once installed, you can check ingress controller pods in the new namespace:
$ kubectl -n ingress-nginx get pods

NAME                                      READY   STATUS    RESTARTS   AGE
ingress-nginx-controller-54bfb9bb-rmwqh   1/1     Running   0          6m31s
Install HelloWorld application
To install an application example, we released a HelloWorld application that can be deployed using the Nginx ingress controller. This helm chart is hosted in our charts repository.
We first need to install the helm repo, secondly the HelloWorld application, and then CrowdSec.
$ helm repo add crowdsec https://crowdsecurity.github.io/helm-charts

"crowdsec" has been added to your repositories
Then update the repositories to get the new charts
$ helm repo update

Hang tight while we grab the latest from your chart repositories...
...Successfully got an update from the "crowdsec" chart repository
...Successfully got an update from the "stable" chart repository
Update Complete. ⎈Happy Helming!⎈
Now, we can install the HelloWorld chart with default values in the default namespace.
$ helm install helloworld crowdsec/helloworld

W0920 12:22:22.434028 298463 warnings.go:70] networking.k8s.io/v1beta1 Ingress is deprecated in v1.19+, unavailable in v1.22+; use networking.k8s.io/v1 Ingress
W0920 12:22:22.792661 298463 warnings.go:70] networking.k8s.io/v1beta1 Ingress is deprecated in v1.19+, unavailable in v1.22+; use networking.k8s.io/v1 Ingress
NAME: helloworld
LAST DEPLOYED: Mon Sep 20 12:22:21 2021
NAMESPACE: default
STATUS: deployed
REVISION: 1
NOTES:
1. Get the application URL by running these commands:
http://helloworld.local/
To access this URL, you need to retrieve the public IP and modify your hosts’ file:
$ kubectl get ingresses.networking.k8s.io

NAME CLASS HOSTS ADDRESS PORTS AGE
helloworld  helloworld.local a8523ec3bb4024bc3a7f8b26294013f3-c7ea4e370eaf1195.elb.eu-west-1.amazonaws.com 80 2m18s

$ host a8523ec3bb4024bc3a7f8b26294013f3-c7ea4e370eaf1195.elb.eu-west-1.amazonaws.com

a8523ec3bb4024bc3a7f8b26294013f3-c7ea4e370eaf1195.elb.eu-west-1.amazonaws.com has address 52.31.225.95
a8523ec3bb4024bc3a7f8b26294013f3-c7ea4e370eaf1195.elb.eu-west-1.amazonaws.com has address 54.73.240.30
a8523ec3bb4024bc3a7f8b26294013f3-c7ea4e370eaf1195.elb.eu-west-1.amazonaws.com has address 176.34.92.134
This command might take some time to get a result when using the EKS AWS service.
We can modify the hosts’ file and add one of the public IP addresses:
echo "52.31.225.95 helloworld.local" | sudo tee -a /etc/hostsNow our application is reachable:
$ curl -v http://helloworld.local

* Trying 52.31.225.95:80...
* TCP_NODELAY set
* Connected to helloworld.local (52.31.225.95) port 80 (#0)
> GET / HTTP/1.1
> Host: helloworld.local
> User-Agent: curl/7.68.0
> Accept: */*
>
* Mark bundle as not supporting multiuse
< HTTP/1.1 200 OK
< Date: Mon, 20 Sep 2021 10:38:21 GMT
< Content-Type: text/plain; charset=utf-8
< Content-Length: 13
< Connection: keep-alive
< X-App-Name: http-echo
< X-App-Version: 0.2.3
<
helloworld!
* Connection #0 to host helloworld.local left intact
We can also look at the Nginx ingress controller logs to see HTTP logs:
$ kubectl -n ingress-nginx logs ingress-nginx-controller-fd7bb8d66-llxc9

82.125.X.X - - [20/Sep/2021:10:38:21 +0000] "GET / HTTP/1.1" 200 13 "-" "curl/7.68.0" 80 0.001 [default-helloworld-5678] [] 192.168.65.115:5678 13 0.000 200 abb8f358776224ff5c14a6c0a227b450
Our environment is ready. Let’s deep dive into the exciting part.
Install CrowdSec
Crowdsec chart is also available in our charts repositories.
First, we need to create a new namespace so that CrowdSec will be isolated:
$ kubectl create ns crowdsec

namespace/crowdsec created
We want to monitor Nginx ingress controller logs because our application is deployed behind the Nginx ingress controller.
We can create a new file crowdsec-values.yaml, containing the CrowdSec chart configuration.
agent:
  # To specify each pod you want to process it logs (pods present in the node)
  acquisition:
    # The namespace where the pod is located
    - namespace: ingress-nginx
      # The pod name
      podName: ingress-nginx-controller-*
      # as in crowdsec configuration, we need to specify the program name so the parser will match and parse logs
      program: nginx
  # Those are ENV variables
  env:
  # As it's a test, we don't want to share signals with CrowdSec so disable the Online API.
  - name: DISABLE_ONLINE_API
    value: "true"
  # As we are running Nginx, we want to install the Nginx collection
  - name: COLLECTIONS
    value: "crowdsecurity/nginx"
lapi:
  env:
    # As it's a test, we don't want to share signals with CrowdSec, so disable the Online API.
    - name: DISABLE_ONLINE_API
      value: "true"
If you want to modify the Docker image environment variables, you can follow this guide.
Now we can install CrowdSec using our config file in the CrowdSec namespace we created previously.
$ helm install crowdsec crowdsec/crowdsec -f crowdsec-values.yaml -n crowdsec

NAME: crowdsec
LAST DEPLOYED: Mon Sep 20 17:46:02 2021
NAMESPACE: crowdsec
STATUS: deployed
REVISION: 1
TEST SUITE: None
And we can see that our LAPI (CrowdSec’s local API) and agent are running:
$ kubectl get pods -n crowdsec

NAME READY STATUS RESTARTS AGE
crowdsec-agent-kf9fr 1/1 Running 0 34s
crowdsec-lapi-777c469947-jbk9q 1/1 Running 0 34s
To test whether CrowdSec detects attacks, we will simulate an attack on the HelloWorld application using Nikto and see CrowdSec metrics and alerts.
We will launch the attack with this command once Nikto is installed.
(launch the attack and cancel it after 20 seconds just to generate some attacks on the application)
$ ./nikto.pl -host http://helloworld.localNow we can get a shell into the CrowdSec agent pod and see metrics and alerts:
$ kubectl -n crowdsec exec -it crowdsec-agent-vn4bp -- sh/ # cscli metrics
INFO[21-09-2021 09:39:50 AM] Buckets Metrics:
+-------------------------------------------+---------------+-----------+--------------+--------+---------+
| BUCKET | CURRENT COUNT | OVERFLOWS | INSTANCIATED | POURED | EXPIRED |
+-------------------------------------------+---------------+-----------+--------------+--------+---------+
| crowdsecurity/http-bad-user-agent | 3 | 183 | 186 | 369 | - |
| crowdsecurity/http-crawl-non_statics | - | 7 | 9 | 351 | 2 |
| crowdsecurity/http-path-traversal-probing | - | - | 1 | 2 | 1 |
| crowdsecurity/http-probing | 1 | - | 2 | 2 | 1 |
| crowdsecurity/http-sensitive-files | - | 3 | 4 | 17 | 1 |
+-------------------------------------------+---------------+-----------+--------------+--------+---------+
INFO[21-09-2021 09:39:50 AM] Acquisition Metrics:
+-----------------------------------------------------------------------------------------------------------------------------------------------------------------+------------+--------------+----------------+------------------------+
| SOURCE | LINES READ | LINES PARSED | LINES UNPARSED | LINES POURED TO BUCKET |
+-----------------------------------------------------------------------------------------------------------------------------------------------------------------+------------+--------------+----------------+------------------------+
| file:/var/log/containers/ingress-nginx-controller-fd7bb8d66-llxc9_ingress-nginx_controller-c536915796f13bbf66d1a8ab7159dbd055773dbbf89ab4d9653043591dfaef1f.log | 371 | 371 | - | 741 |
+-----------------------------------------------------------------------------------------------------------------------------------------------------------------+------------+--------------+----------------+------------------------+
INFO[21-09-2021 09:39:50 AM] Parser Metrics:
+--------------------------------+------+--------+----------+
| PARSERS | HITS | PARSED | UNPARSED |
+--------------------------------+------+--------+----------+
| child-crowdsecurity/http-logs | 1113 | 738 | 375 |
| child-crowdsecurity/nginx-logs | 371 | 371 | - |
| crowdsecurity/dateparse-enrich | 371 | 371 | - |
| crowdsecurity/docker-logs | 371 | 371 | - |
| crowdsecurity/geoip-enrich | 371 | 371 | - |
| crowdsecurity/http-logs | 371 | 360 | 11 |
| crowdsecurity/nginx-logs | 371 | 371 | - |
| crowdsecurity/whitelists | 371 | 371 | - |
+--------------------------------+------+--------+----------+
Metrics show files read by CrowdSec (in the acquisition table) and how many are parsed/unparsed, all scenarios triggered by the logs (in the bucket table). As we installed the collection crowdsecurity/Nginx, it comes with multiple scenarios that detect HTTP attacks.
Now let’s see if the CrowdSec agent detects something:
/ # cscli alerts list
+----+------------------+--------------------------------------+---------+---------+-----------+--------------------------------+
| ID |      VALUE       |                REASON                | COUNTRY |   AS    | DECISIONS |           CREATED AT           |
+----+------------------+--------------------------------------+---------+---------+-----------+--------------------------------+
|  3 | Ip:82.125.X.X    | crowdsecurity/http-sensitive-files   | FR      |  Orange | ban:1     | 2021-09-21 09:38:12.624461519  |
|    |                  |                                      |         |         |           | +0000 UTC                      |
|  2 | Ip:82.125.X.X    | crowdsecurity/http-crawl-non_statics | FR      |  Orange | ban:1     | 2021-09-21 09:38:12.104034837  |
|    |                  |                                      |         |         |           | +0000 UTC                      |
|  1 | Ip:82.125.X.X    | crowdsecurity/http-bad-user-agent    | FR      |  Orange | ban:1     | 2021-09-21 09:38:12.104018425  |
|    |                  |                                      |         |         |           | +0000 UTC                      |
+----+------------------+--------------------------------------+---------+---------+-----------+--------------------------------+
Those are alerts raised by the CrowdSec agent following our Nikto scan. We can see that several scenarios were triggered and the agent sent ban decisions to the LAPI. It means that it will be stored and shared with the bouncers to block this IP.
Clean up
If you want to clean up your cluster, follow those steps:
If you deployed your K8s cluster following this tutorial, you just need to remove it with eksctl
eksctl delete cluster -f cluster.yamlIf you used an existing cluster, you need to delete the helm charts we installed:
$ helm delete crowdsec -n crowdsec
$ helm delete helloworld
Uninstall the Nginx ingress controller if you installed it using this tutorial:
kubectl delete -f https://raw.githubusercontent.com/kubernetes/ingress-nginx/controller-v1.0.0/deploy/static/provider/aws/deploy.yaml
Conclusion
This tutorial looked at the basics of installing CrowdSec in Kubernetes and how it can easily detect attacks. But detection without prevention is not a complete process. You can head over to part 2 to follow the guide and set up the remediation part.
About the author
Coming from a sys admin then pentester/secops background, Hamza is now DevSecOps at CrowdSec. He is also a member of the core team.