Introduction
Each user who accesses your site is identifiable by an IP address. CrowdSec is an open source tool capable of determining whether this IP is potentially malicious or not. To do so, the CrowdSec agent that you will have installed on your server will analyze different data sources (log files, etc.). According to predefined remediation scenarios, a decision will be recommended for the IP in question: let it pass if nothing suspicious is detected, ask for a captcha resolution if there is any doubt or ban the IP for a certain period of time.
One of the strengths of CrowdSec is that this knowledge base is shared between all users: if your server is attacked, the decisions made will be used by others, but you will also benefit from decisions from other users around the world. The role of the bouncers is to implement the decisions made.
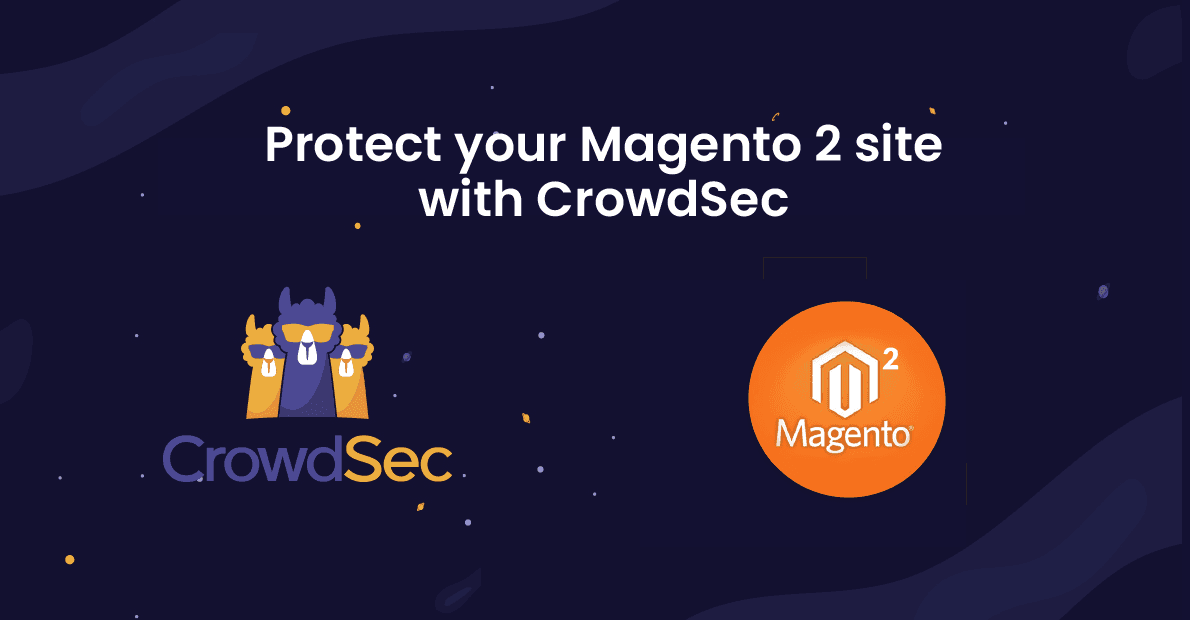
Now available on the Magento marketplace this is exactly what the CrowdSec_Bouncer does: when a user is suspected of being malicious, the module displays either a captcha to solve or simply a page notifying that access is denied. If the user is considered as not suspicious, he/she will access the page normally.
With this guide, you will learn how to install and configure the CrowdSec_Bouncer module for Magento 2.
Prerequisites
For this tutorial, you will need:
- a server or local environment with a Magento 2 instance installed. (To date, the CrowdSec_Bouncer module is compatible with Magento 2 from version 2.3.0 to version 2.4.3)
- an active CrowdSec agent. For this, you can refer to the documentation. Note that CrowdSec must be installed on a server accessible via the Magento 2 site. (Magento 2 and CrowdSec do not need to be installed on the same server, although this is the easiest way.)
Step 1 – installation
The installation of the CrowdSec_Bouncer module is a classic Magento 2 module installation. First, you will install the module using composer. Then, you will run some post-installation commands to have a ready-to-use module. All commands in this step must be started from the root folder of Magento 2
Be sure that the crowdsecurity/linux is installed (and more precisely, the crowdsecurity/syslog-logs parser, all this can be seen with cscli hub list) because as the first “parser” in the chain, it will direct the logs to the right parser – in our case asterisk, but more on this later.
Adding sources
Run the following command to add the CrowdSec_Bouncer module as a dependency:
composer require crowdsec/magento2-module-bouncerPost installation
Activation of the module
After installing the module sources , it must be activated. To do this, run the command:
bin/magento module:enable CrowdSec_BouncerYou should be able to read the following message:
The following modules have been enabled:
- CrowdSec_Bouncer
Upgrade
Once the module is activated, you must upgrade Magento 2. If you are in `production’ mode, run the build command first (this is not required in developer mode):
bin/magento setup:di:compileCleaning the cache
The Magento 2 cache must be cleaned with the command:
bin/magento cache:flushDeployment of static content
Finally, you need to deploy the static content:
bin/magento setup:static-content:deploy -fAt this point, the module is ready to be used, but its functionality is not yet configured and activated.
In the next step, you will configure the basic options to test that everything works as expected.
Step 2 – Basic configuration
In this chapter, you will first navigate to the CrowdSec bouncer configuration tab. Then, you will check that the communication between Magento 2 and your CrowdSec agent is operational. Finally, you will do some functionality tests.
Configuration page
From your back office dashboard, you will find the module configuration page by navigating as follows:
Connecting to CrowdSec
Here you can test the connection between Magento 2 and your CrowdSec agent.
In the Your LAPI url field, you have to fill in the url used to contact the CrowdSec agent. If you have installed CrowdSec on the same server as Magento 2, you just have to fill in http://localhost:8080.
In the Your bouncer key field, you have to fill in the key that will be used for authentication. To do this, you must first use a cscli command available when CrowdSec is installed. This command is the following (you can use any bouncer name you like. Here we call it magento2-bouncer.):
cscli bouncers add magento2-bouncerIn return, you will get a key: do not lose it and do not give it to anyone. Copy this key into the Your bouncer key field.
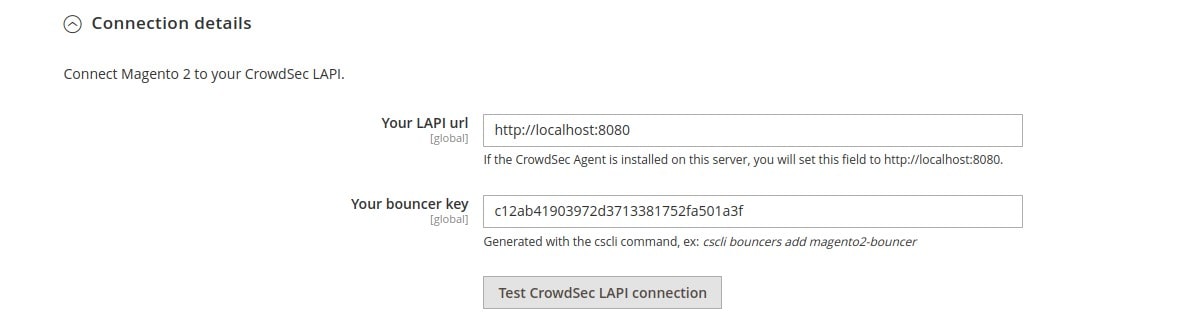
Before saving, make sure the connection works by clicking on the Test CrowdSec LAPI connection button. If successful, you will get the below message and can save the configuration:
Connection test result: successFirst test
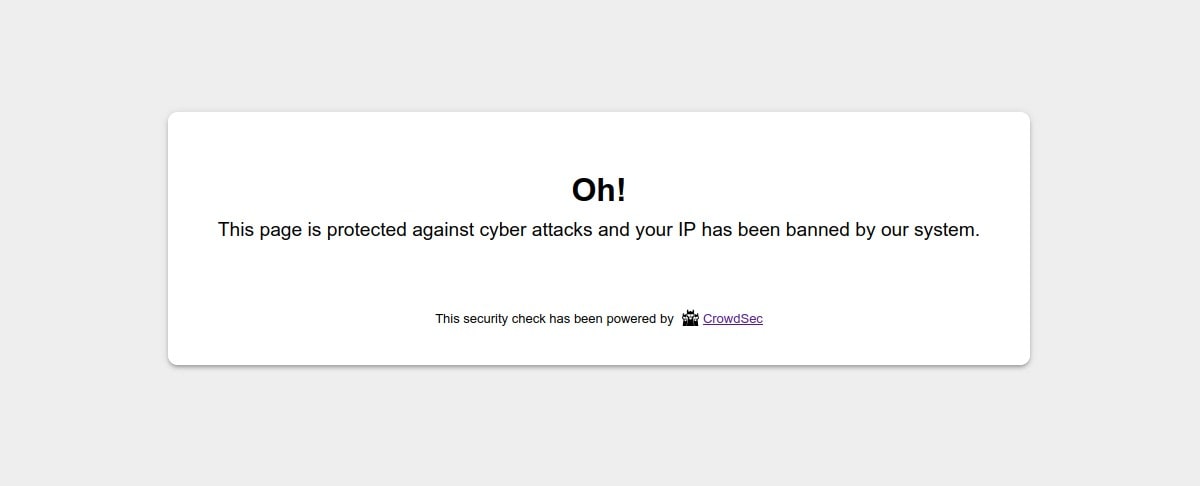
Now that everything is in place, you will do a simple test: ban your IP and see that the bouncer forbids you to access the site. Don’t worry, you will the command to unban yourself a little further down.
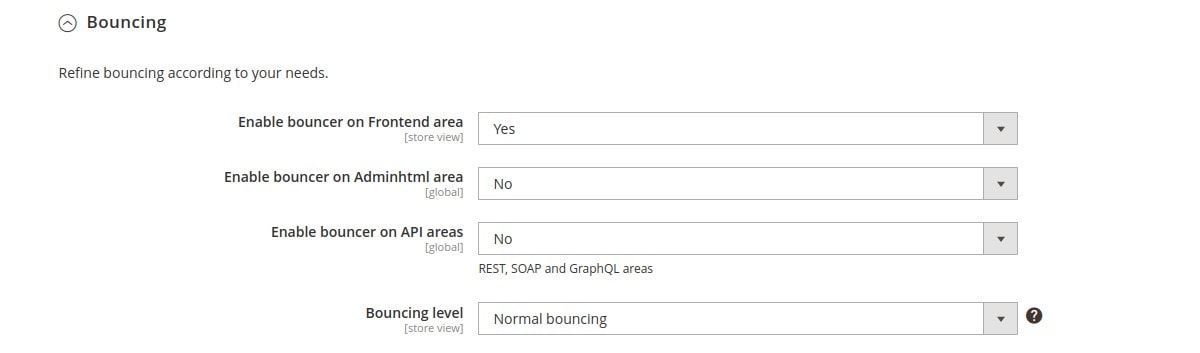
First of all, enable the bouncer on the frontend area of your site by selecting Yes from the Enable bouncer on Frontend area dropdown menu in the General Settings → Bouncing section:
Since your IP is not yet considered malicious, you can go to a page on your site and won’t notice any changes. You can ban your IP by running the following cscli command:
cscli decisions add --ip --duration 1h --type ban In practice, you will not have to manually add the decisions for this or that IP : the CrowdSec agent will take care of it according to the installed scenarios.
Once this command has been launched, your access to the site will be impossible and you will get the following display:
Now allow access to the site for your IP again by deleting the previous decision:
cscli decisions delete -i This is the most common use case. You will now see in the next step how to play with the different configurations to adapt the bouncer to your needs.
Step 3 — advanced configuration
The CrowdSec_Bouncer module offers many configurable options: from a visual point of view to more technical and functional aspects. We will describe below the most useful settings.
Flexibility
A Magento 2 site is accessible from several zones (areas). You have the possibility to activate the bouncer on one or more zones, depending on your needs.
The main one is the frontend area. We have seen above how to enable the bouncer on this area. You will notice that this configuration Enable bouncer on Frontend area is configurable by Store view. You can also choose to enable the bouncer on the back office area (Enable bouncer on Adminhtml area) or to protect REST, SOAP and GraphQL API calls (Enable bouncer on API areas).
Moreover, the Bouncing level configuration allows you, by choosing Flex bouncing, to never ban an IP by displaying, at worst, a captcha. It becomes impossible to accidentally block access to your site to people who do not deserve it.
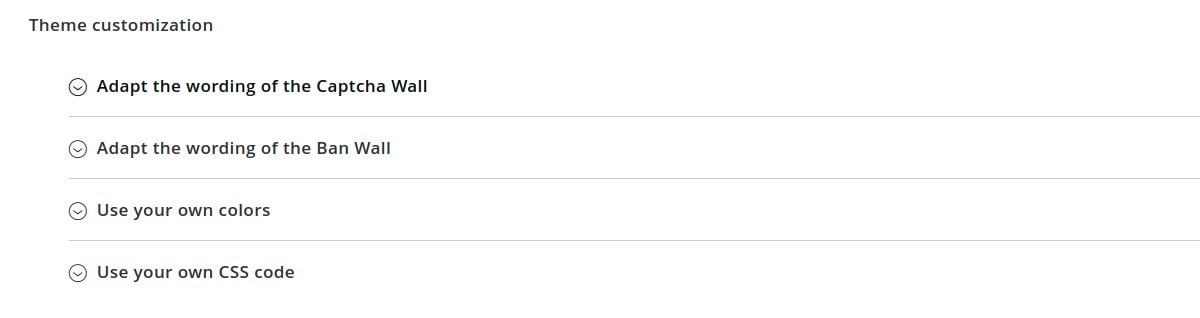
Graphic charter and labels
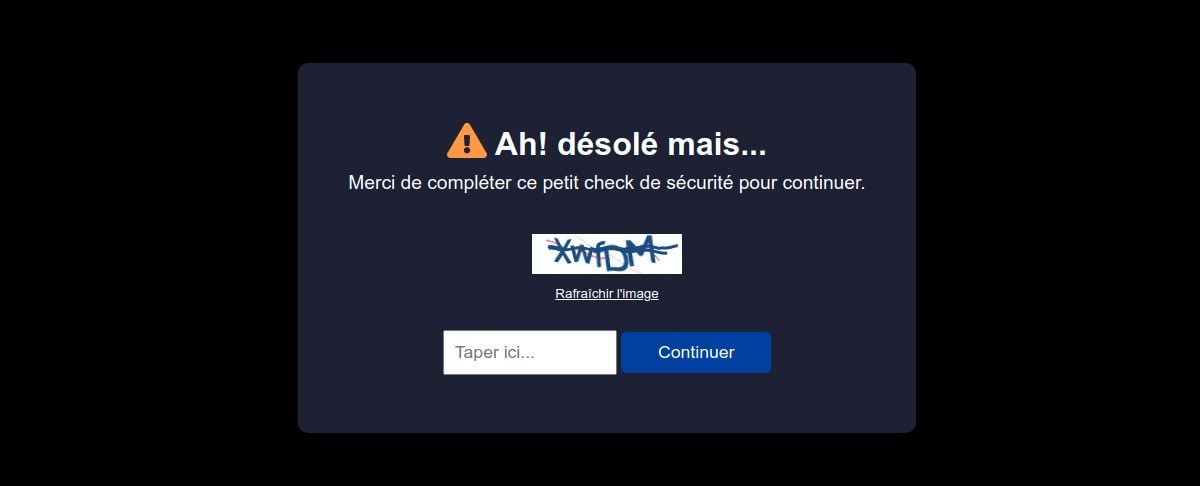
Depending on the case, the bouncer displays a ban page or a captcha page. It is possible to customize all the colors of these pages in a few clicks so that they fit your graphic charter. On the other hand, all texts are also fully customizable. This will allow you, for example, to present pages translated into the language of your users. These configurations are accessible in the Theme customization section:
You can, for example, get a captcha page (here in French) with the following design:
Cache management and asynchronous mode
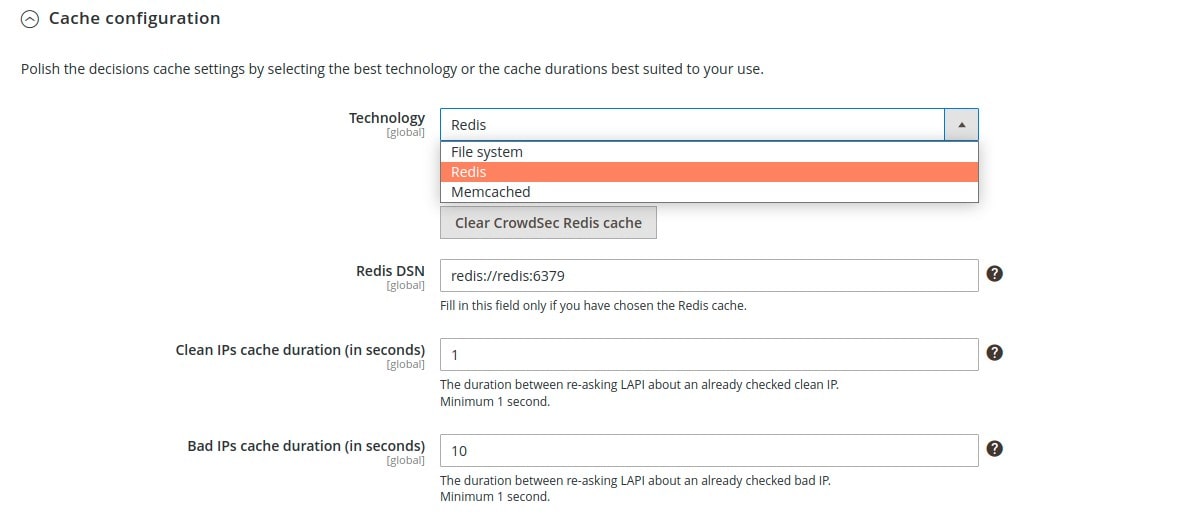
By default, the “Live mode” is activated. This means that the first time a user connects to your website, their IP will be verified directly by CrowdSec’s API. The rest of your user’s browsing experience will be even more transparent thanks to the fully customizable caching system. In particular, you can choose between a file system, Redis or Memcached to manage the CrowdSec API cache.
But you can also activate the “Stream mode”:

This mode allows you to constantly feed the CrowdSec cache with the list of malicious IPs via a background task (CRON), which makes it even faster when checking the IPs of your visitors. Furthermore, if your site has many unique visitors at the same time, this will not influence the traffic to the API of your CrowdSec instance.
CDN, proxy and load balancers
If you are using a CDN, reverse proxy or load balancer, you can specify in the settings the IP ranges of these devices to check the IP of your users. For other IPs, the bouncer will not trust the `X-Forwarded-For’ header:

Conclusion
With this guide, you have had an overview of what CrowdSec and its specific Magento 2 bouncer could bring to the table. Not all configurations have been analyzed in detail, but you should now have a pretty good idea of the possibilities.
And if you any questions or wish to discuss this module or any other CrowdSec topic you can contact the team on Discourse or Discord.