Even if CrowdSec isn’t designed to be an EDR in first intention, it is very efficient at blocking ransomware lateral moves, where Windows machines are often involved. In this article, we are going to explore how to configure CrowdSec to detect and stop ransomware from spreading through your internal networks.
Note: this is intended to give you a general idea of the topic. However, it should not be deployed straight into production as this is a proof of concept.
The initial compromise
When a cybercriminal group is targeting your organization, they can use several methods to breach in and get a first foothold. The method used for this initial compromise often falls into one of the following categories:
- Credential Reuse: an employee sold its legitimate remote credentials to a ransomware group.
- Credential stuffing: it can also happen that this employee was using similar credentials on a different system and those were compromised during a data leak or a breach and then reused against your organization.
- Internet-exposed service vulnerability: your organization runs a workload that is exposed over the Internet, like a mail, web, or VPN service, and the program behind it is vulnerable, leading to a breach.
- Password brute force: the password used to protect specific remote access (web, ssh, tse, telnet, ftp, sftp, vpn, etc.) was too weak and was guessed after many attempts by a cybercriminal.
- Web vulnerability: by design, most web contents are exposed over the Internet and some contain vulnerabilities like XSS, SQL Injection, and the like. Those can lead to an initial compromise in the DMZ.
- Drive by download / Phishing email: the classic attempt to get a user to download a trapped content and get him/her to open it on the target machine to take over it.
There are other cases (WiFi, Bluetooth, plugging a rogue USB stick, etc.) but those are very classic cases.
Lateral move tactics
Even if CrowdSec isn’t designed to be an EDR in first intention, it is very efficient at blocking the ransomware lateral moves, where Windows machines are often involved. The goal of a so-called “lateral move” is to check if interesting neighbors in the network vicinities are poorly protected.
Password brute force (TSE, Microsoft SQL, SSH, SFTP, FTP, Telnet, Samba shares), scans (Web, Ports), and enumerations (AD, DNS, Bonjour, Samba) are amongst the most classic methods for cybercriminals to both extend their position in your network, to identify the sensitive content to cipher and cripple the backup systems.
How to secure your Windows servers using CrowdSec
Credential Bruteforce & stuffing leave clear trails in logs, which can be identified and reported/blocked by CrowdSec’s Agent. The same is true for port scans. The most effective way to deal with them is simply to install the Windows firewall bouncer, which will block attempts past a certain threshold.
The authentication system being centralized, it’s likely that any other daemon/service running on your windows server or workstation will rely on this system, and one scenario then covers multiple other protocols like Samba, SSH, TSE, etc.
Web scans on IIS (Internet Information Server, Microsoft’s webserver) can be detected using this collection. For Microsoft SQL, you can look here.
Some CVE (vulnerabilities) are detected, like windows-CVE-2022-30190-msdt, and more will be added over time.
Regarding Credential reuse, the problem is trickier and will be the focal point of another article. Yet the global logic will be along the lines of detecting changes compared to the expected user behavior. For example, if a user account is being connected from an unusual country, IP, or time frame compared to what is expected, the goal will be to either block it or alert the SoC team with an HTTP notification or a Servicenow push.
CrowdSec cannot directly address phishing & drive-by downloads but you can refer to software security suites like Vade Secure or Proofpoint to protect your users (and train them).
Guide on configuring CrowdSec to detect and stop ransomware
Within this article we are going to explore how to configure CrowdSec to detect and stop ransomware from spreading through your internal networks. If you are new to installing CrowdSec on Windows then check the official documentation on how to install.
Note: CrowdSec is not an anti-virus and will never replace these types of products. This article is meant to explore the topics and how running CrowdSec alongside could prove useful.
Once Crowdsec is installed, we have to install Sysmon. Sysmon can detect changes in the file system and log directly to the event viewer. For those more familiar with Linux environments, you can see Sysmon as a auditd for Windows.
Crowdsec can then monitor these events for suspicious behavior and then take action against the program that was detected. To ease the installation of Sysmon, I have written a powershell script that will download and configure using Florian Roth Config File which can be found here.
If you wish to run each command step-by-step you can read the contents within the link. Once both components are installed we can start by updating our acquis.yaml file to inform Crowdsec to start monitoring events via the Microsoft-Windows-Sysmon/Operational channel. To achieve this add to the bottom of the “c:/programdata/crowdsec/config/acquis.yaml” these contents: (Note you may need to open notepad / text editor as “administrator”)
---source: wineventlog
event_channel: Microsoft-Windows-Sysmon/Operational
event_ids:
- 11 #Event 11 is file creation
event_level: information
labels:
type: eventlog
Save and close the file, next within a powershell we can now run cscli parsers install crowdsecurity/sysmon-logs. By default, the windows installation of CrowdSec does not come with this parser so we need to add it manually.
We have now configured CrowdSec to monitor and understand the Sysmon event logs, however, next we need to create a scenario to turn the events into a remediation. I have created an example scenario here: in short, it detects if the file extension is a known ransomware extension and if there has been a big spike in file creation from a single process then will trigger an alert with the value set to the process ID.
We need to download and store the scenario under C:programdatacrowdsecconfigscenarios to which you can run the following powershell command Invoke-WebRequest -Uri “https://raw.githubusercontent.com/LaurenceJJones/crowdsec-poc-oct-15/main/crowdsec/scenarios/sysmon-pid-bad-file-ext.yaml” -OutFile “C:programdatacrowdsecconfigscenariossysmon-pid-bad-file-ext.yaml
Since this is a manually created scenario we need to download the file extension list and place it within the data directory “c:/programdata/crowdsec/data/”. You can also run a single powershell command Invoke-WebRequest -Uri “https://raw.githubusercontent.com/LaurenceJJones/crowdsec-poc-oct-15/main/ransom_ext.txt” -OutFile “C:programdatacrowdsecdataransom_ext.txt to do this automatically.
Please note the file MUST be named the same as what is listed in the scenario if it is not CrowdSec will fail to load the scenario. Great, we are now starting to act on the events that are parsed from the Sysmon.
Primarily CrowdSec is configured out of the box to detect bad IP’s so we must configure it to treat these alerts differently from the default. Open c:/programdata/crowdsec/config/profiles.yaml (May need to open text editor as “administrator”) and add to these lines to the bottom:
---
name: pkill_pid
filters:
- Alert.Remediation == true && Alert.GetScope() == “pid”
notifications:
- pid_default
on_sucess: break
So if the scope of the alert is “pid” it will then send a notification to pid_default. What is pid_default? It is a custom notification plugin I wrote to take the PID and send a pkill command.
The reasoning behind this is that if we designed it to be within a bouncer, there would be time between when the bouncer would ask the LAPI about new decisions and within a time-sensitive manner such as ransomware, every second counts and allowing CrowdSec to push the alert to the plugin made more sense.
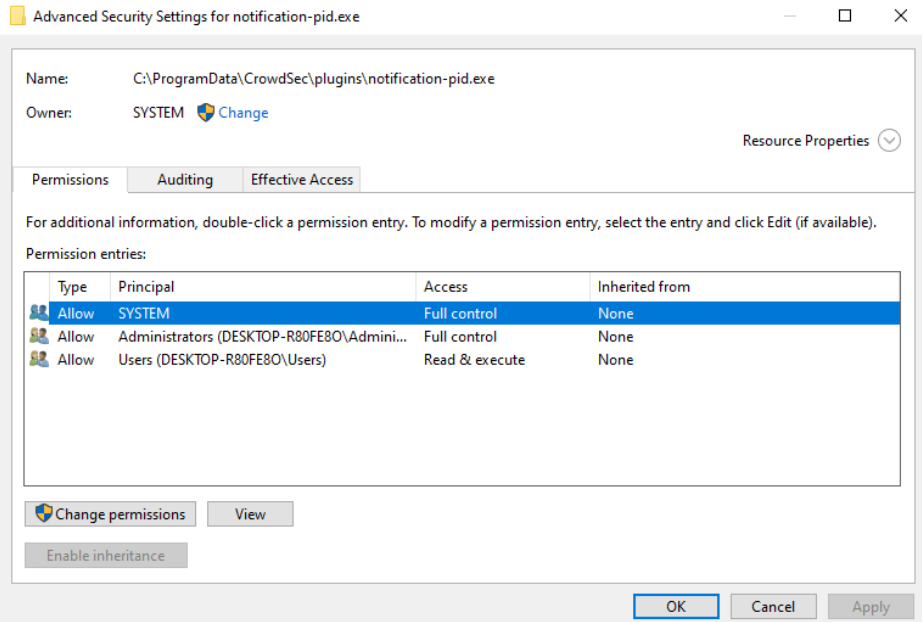
To set up the custom notification plugin we need to download the binary from here and place it within c:/programdata/crowdsec/plugins/. However, we need to alter the permissions on the binary since CrowdSec will not load any plugin that is not owned by SYSTEM so to be sure copy the exact permissions that are present below:

In short you need to set the “owner” of the binary to be “SYSTEM” and “SYSTEM” must have full control permissions. No other user / group than “administrator” can have full control permissions. If you do not do this CrowdSec service will fail to start.
Next, we need to set up the notification config file so that when CrowdSec triggers an alert it will know which process it needs to send data to over GRPC. We have a pre-configured file here so you would just need to download and place the file within c:/programdata/crowdsec/config/notifications/.
That is all the pieces needed to configure to allow CrowdSec to detect ransomware. Now we can restart the service by opening services.msc, right-clicking CrowdSec and selecting “restart” OR we can run a command via PowerShell Restart-service crowdsec. If you get an error check the file c:/programdata/crowdsec/log/crowdsec.log (any lines with fatal on) then report them by opening an issue here or via our Discord community.
Time to test!
For this, we don’t suggest you download any ransomware and fire it away. As stated, it is currently designed to look for those file extensions. So we found a useful tool called “RansomWare Simulator”, contributed by Florian Roth, yes, the same user that created a Sysmon configuration file.
In short, this binary can create a directory full of files and then “encrypt” those files as a simulation, so there is no risk to your network of deploying actual ransomware. Note: the current version of ransomware simulator is within Microsoft Defender signals so for testing purposes we will be disabling Defender and turning off “real-time” detection.
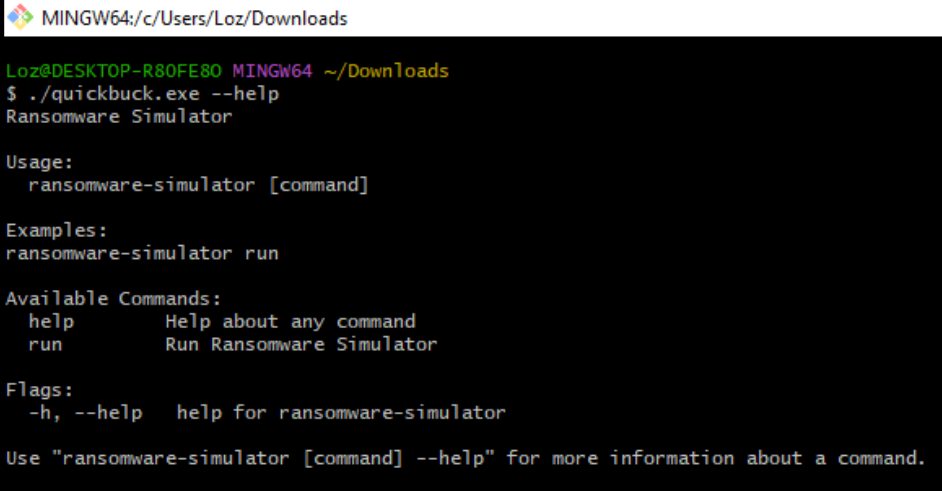
We agree that a user should NEVER do this, but for testing purposes, we will be doing this within our demo environment. We can start by downloading the Quickbuck.exe from the ransomware simulator GitHub repository here. In short, this binary creates a sub-process called WINWORD.EXE to create 10K files to then “encrypt” with the “enc” extension.

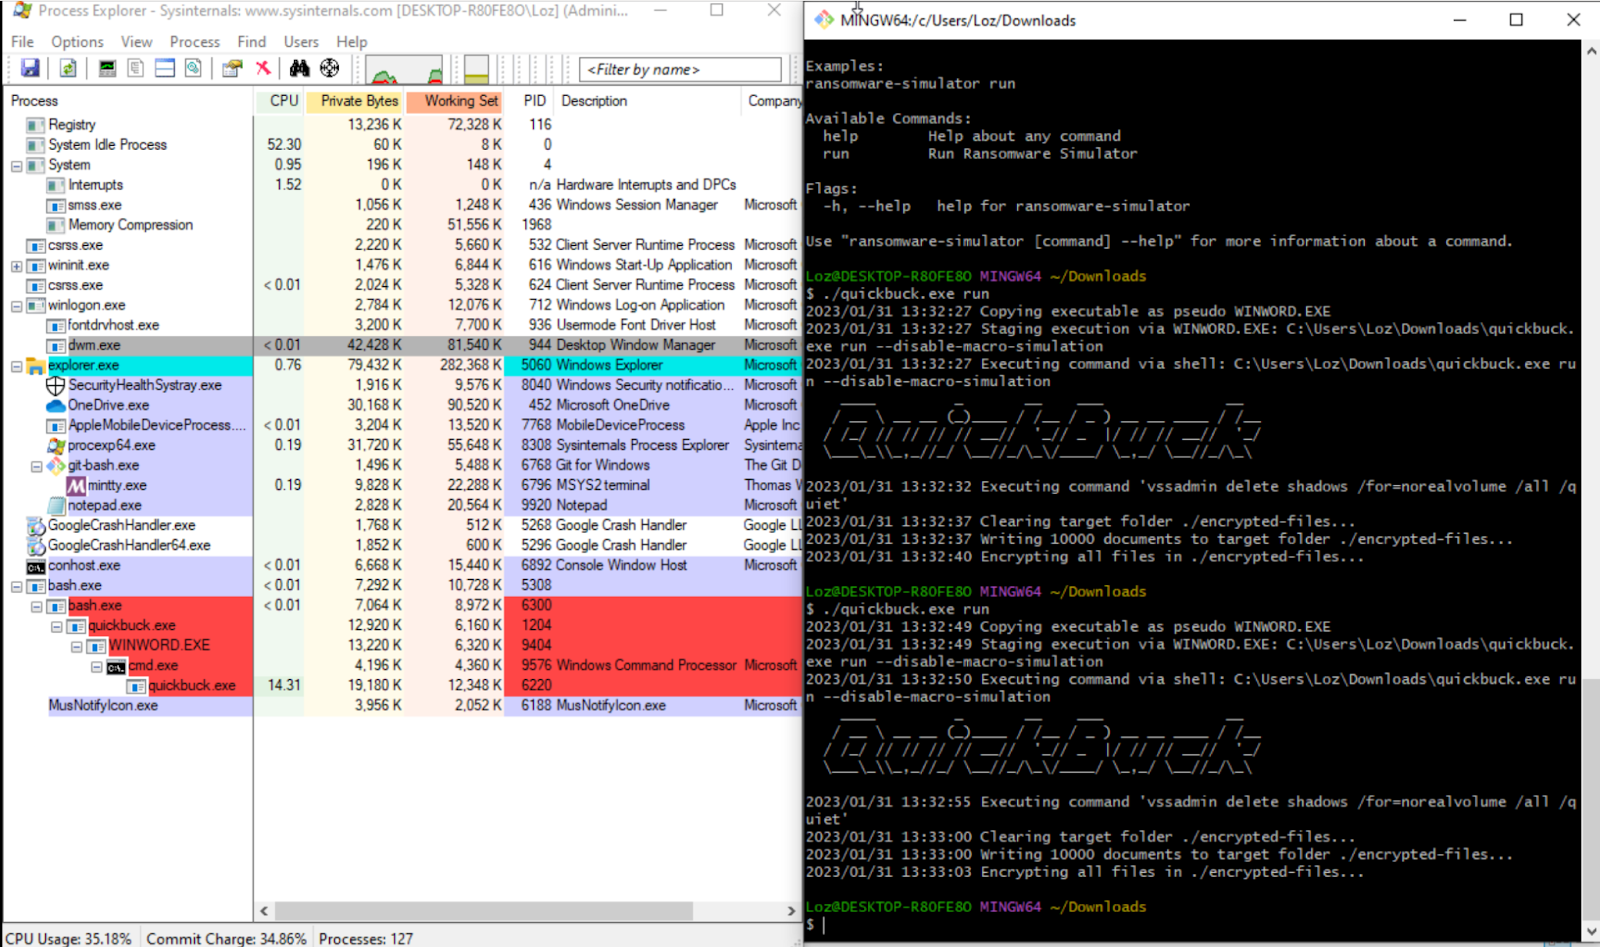
Running the ransomware simulator with run argument starts the process which we can monitor via “Process Explorer” and detect when the PID is interrupted by our notification plugin.

We can further confirm that the plugin took action by checking the CrowdSec logs and finding the PID corresponding to the image above.

CrowdSec managed to detect the bad behavior within 3.5ms, after the encryption of the files started. You don’t see any feedback from the program as it’s not set up to notice once it is interrupted.


