We recently released a new tool: the CrowdSec Console. It is a cockpit-like web interface hosted by CrowdSec on servers located in Europe that will allow you to connect your different CrowdSec instances to have an overview of the status of your servers, including alerts and blocked IP addresses, etc.
The CrowdSec console is free in its community version, which includes many features. An offering for companies with more complex needs is also at hand. The paid versions remove some of the limitations of the free version, which is already quite comprehensive. In this article, we will use the free version so that you can see what you can do with this console without paying a cent.
Before getting into the tutorial, here is the official website of the CrowdSec Console, where you can take a quick product tour and create your account.
Features of the CrowdSec Console
Here is a three-point summary of the features of the CrowdSec Console:
- Monitor all CrowdSec instances you manage (status, installed version, supported scenarios, bouncers, etc.)
- Summary of alerts on each instance to get more information about the attacker’s origin (IP address, country of origin, aggressiveness, type of attack, etc.)
- Cyber Threat Intelligence (CTI) to obtain information on the reputation of a specific IP address, based on the power of the CrowdSec community and the various data collected and reported by all instances
Later on, other functionalities will be added to the CrowdSec Console to act directly on the managed CrowdSec instances, in particular, to update the scenarios, add a new bouncer, etc.
You can see the differences between the free and paid versions of CrowdSec Console on the pricing page. Be assured hat there will always be a free offer.
Getting started
A. Create an account
Go to app.crowdsec.net to create a free account by clicking on “Subscribe” and start enjoying the CrowdSec console. It only takes a few seconds since you just need to enter an e-mail address, a password, and the validation code you received by e-mail.

Once the registration is done, you can log in. The next step is to connect your CrowdSec instances to the console.
B. Register a CrowdSec instance
Registering an instance is not very complicated because the enrolment command is presented on the screen. It includes the token corresponding to your CrowdSec console. By executing this command on each of your CrowdSec instances, you can connect the CrowdSec console to your instances in a snap.
sudo cscli console enroll cl1111111111111111111111vpWith this command, the registration request will appear. It is possible to name the instance differently as per below:
sudo cscli console enroll cl1111111111111111111111vp --name "WIN-CROWDSEC"You can also add tags directly from the registration via the “-tags” parameter:
sudo cscli console enroll cl1111111111111111111111vp --name "WIN-CROWDSEC" --tags Windows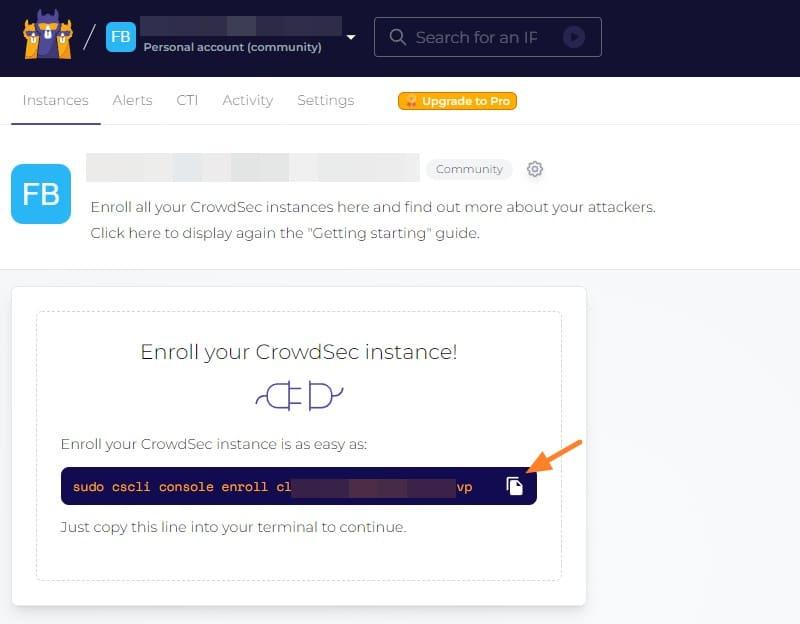
The registration command will be identical on a Linux or Windows host. The difference is that on Windows, you should not specify “sudo” in front of the command but execute the command in an Administrator console.

Following the execution of this command, an enrolment request will be displayed on the Web console. Simply click on “Accept” to validate the enrolment. Without this, the registration will remain pending.

The instance will appear in the CrowdSec console. On the instance side, you have to restart the CrowdSec service so that the information is sent to the console immediately.
- On Windows:
Restart-Service crowdsec- On Linux:
systemctl restart crowdsec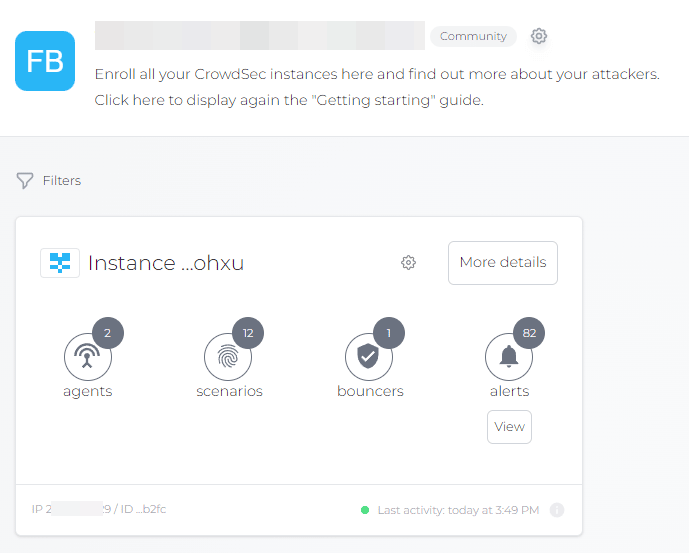
The command below allows you to see the status of the connection to the console, including what is active or not in sending data.
cscli console status
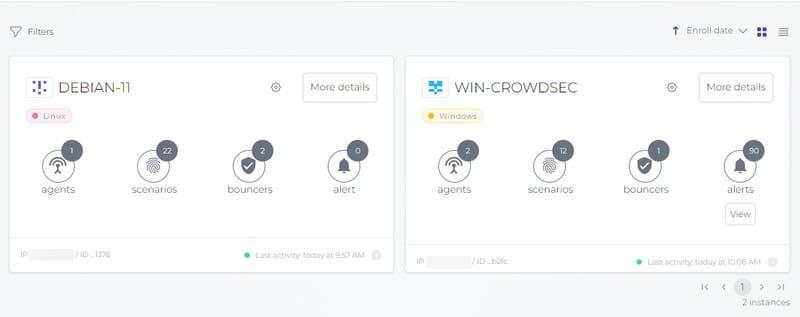
The CrowdSec console home page displays the “Instances” tab, which gives an overview of all CrowdSec instances connected to this account. The thumbnail integrates some information, like the number of alerts, bouncers, or the tags associated with each instance. Indeed, you can rename the instance as you wish and assign one or more tags to it.
When registering to the console, if you get the error “While executing root command: unknown command “console” for “cscli,” there is no need to panic. This simply means that your CrowdSec version is not the most up-to-date and does not support the console. The command below allows you to check what is the current version of your CrowdSec instance:
cscli versionTo update CrowdSec, you can update the package cache on your machine and perform a package upgrade.
sudo apt-get updatesudo apt-get upgradeIf your system does not offer you an update of CrowdSec, it is perhaps that you do not use the official repository. To add it, run this command:
curl -s https://packagecloud.io/install/repositories/crowdsec/crowdsec/script.deb.sh | sudo bashOnce this is done, run the command below again. Then it will be necessary to re-run the console registration command.
sudo apt-get upgradeC. View alerts
Let’s discover the console by looking at the different tabs. The “Alerts” tab allows you to view the alerts of a specific instance or all of them. We can immediately see the interest of the console, which will enable consolidating the data coming from the different servers where CrowdSec is deployed.
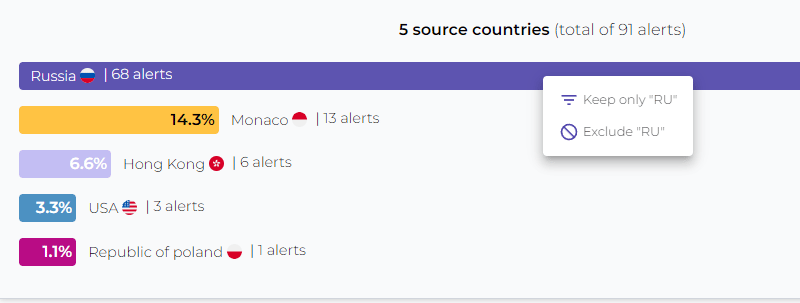
If we select an instance, the “Visualizer” section appears with a history of alerts formatted with graphics that are updated in real-time. For example, we can see which IP addresses attacked our machine the most during a given period. We can only see from which countries the attacks are coming to my servers. The free version’s history is limited to the last 7 days (or 500 alerts).
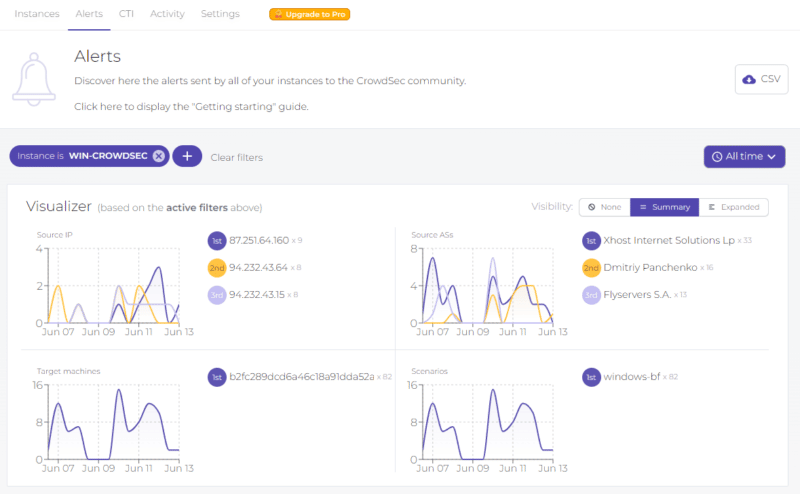
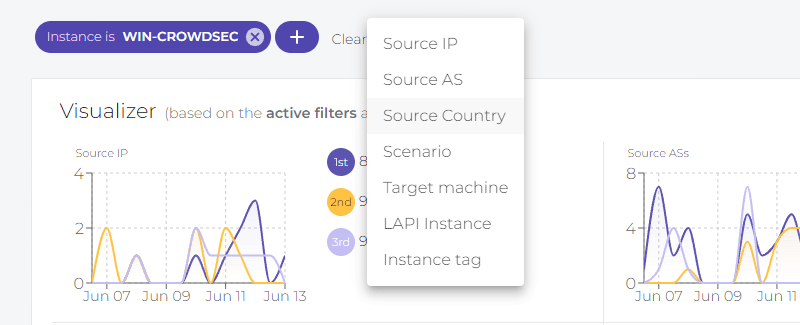
We can combine the use of several filters. For example, we can not select an instance and instead put a filter on a source IP address to see if the same IP address has attacked several of our CrowdSec instances.
You can click on the different elements (IP address, country, scenarios) in the lists or graphs to create filters easily. To put it short, when you want to make a filter, it is not mandatory to go through the “Filter” menu.
By going down the page, we can get a list of the latest alerts, same as using the “cscli alerts list” command, except that here we have the information on the web page directly, and for all CrowdSec instances. When using the above command, you have to switch to each instance.

By switching to the “Expanded” view instead of “Summary,” the graphs get more extensive and more detailed, allowing for a more accurate analysis. This is also an opportunity to see the list of IP addresses responsible for attacks on your servers.
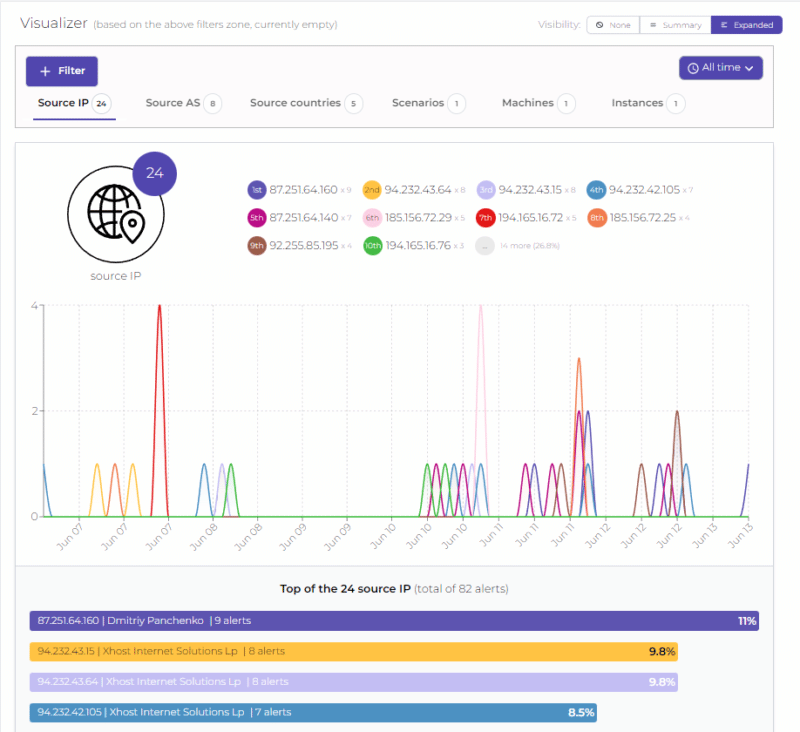
We can also create filters to include or exclude values with a single click.
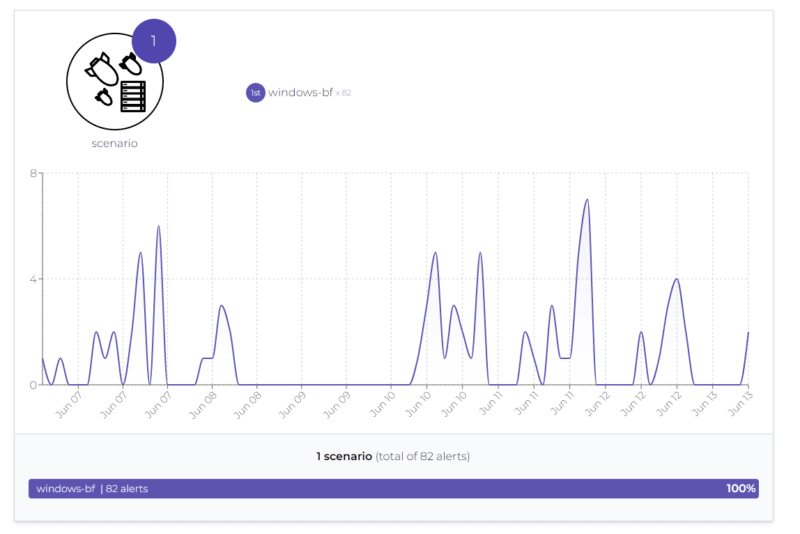
We can also access statistics on the scenarios. In the below example, the CrowdSec instance is running on a Windows server, and we can see that all the blocked attacks are “windows-bf” type, i.e., brute force on authentication. The graph also shows the evolution over time.
D. The CTI
The CTI tab refers to Cyber Threat Intelligence, i.e., the collection of information from all deployed CrowdSec instances to categorize the different IP addresses behind attacks. With this feature, the full power of the CrowdSec community is harnessed!
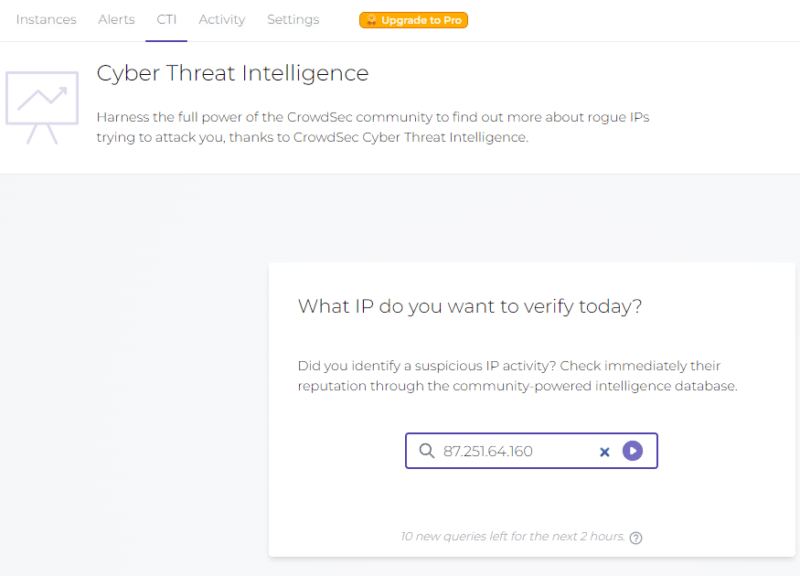
An IP address has behaved in a certain way on my server (e.g., brute force SSH attack every day), but what about the rest of the community? By relying on CTI, we can learn more about the IP address that caused the attack. This is a way to determine which IP addresses are the source of attacks on your server: is it an aggressive IP address? Is it a targeted attack? Is it a bot? Let’s take an example with the IP address “87.251.64.160” which regularly targets our Windows server: is it the top source IP address?
Note: for this example, we went through the “CTI” tab and then specified the IP address. Nevertheless, you can directly click on an IP address in the “Alerts” section and then on the “More about X.X.X.X” button to access the CTI directly on the page of this IP address.
We already know that it is located in Russia, but thanks to CTI, I also know that it is known to perform TCP scans and brute force attacks on RDP and SSH access. This makes sense since this server is accessible via RDP on the default port. On the one hand, this is also reassuring as it is probably a bot performing automated attacks.
In addition, the “Community Report” section allows you to see to what extent the CrowdSec community has spotted this IP address. You can visualize a rate of aggression over the last 24 hours, the previous 7 days, and earlier, which is a good indicator in terms of trend. We can also see from the calendar under “Report period” that this IP address has been used to perform attacks since November 2021 and is still active today.

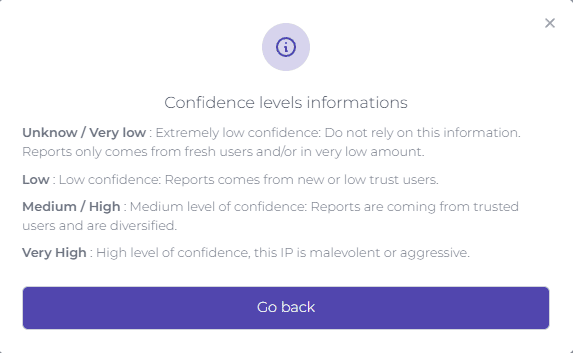
The level of trust gives an overall assessment of this IP address and considers the different indicators. Here is a description of the different levels:
E. The “Activity” & “Settings” tabs
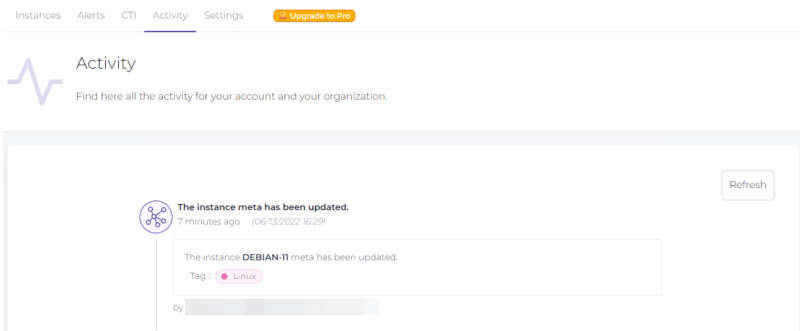
The “Activity” tab lets you have a history of the activity within the CrowdSec console: new instance added, instance modified, etc. As for the “Settings” tab, it allows you to add users (but this is limited to one account in the free version), manage payment information, or activate the MFA to secure access to the CrowdSec console (recommended, of course!)
Conclusion
In addition to providing comfort in reading the information thanks to this user-friendly web interface, the CrowdSec console helps analyze malicious IP addresses at the origin of attacks on servers protected by CrowdSec. You can also access insightful statistics, compare the attacks received by your different servers and use Cyber Threat Intelligence to learn more about a malicious IP address.
What do you think of the CrowdSec console? Will you connect your instances to it? If you have ideas or suggestions for features you would like us to add, stop by our Discord server and let us know! Alternatively, you can take a product tour here and get started.
Disclaimer: This article was initially published in French by CrowdSec early user and supporter IT-Connect. We loved it very much and decided to make it available to a larger audience by translating it into English. You can find the original version here and check out the video tutorial on how to monitor attack on your servers with CrowdSec Console here.
